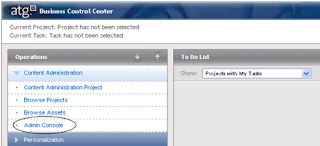
Manually Configure Deployment in CA Server

Click Configuration link in the left column under 'Deployment Administration'.
Set up the Production Environment.
Set up the Production Environment.
Click on the Add site link and Enter the following information.
Scroll down further to the Setting Repository Mappings area.
Select /atg/commerce/catalog/ProductCatalog as the source repository and /atg/commerce/catalog/ProductCatalog_production
Select /atg/commerce/catalog/ProductCatalog as the source repository and /atg/commerce/catalog/ProductCatalog_production
as the destination repository.
It should look like the image below. Click the Add button.
Repeat the same step above for mapping other repositories
like ClaimableRepository, PersonalizationRepository, and SecurePriceLists(mapped to PriceLists_production) and yourRepository component.
Click Save changes.
Click on the Agents tab, pictured below.
Click on the Add agent to site link. Enter the following information
Agent name: prod
Transport URL: rmi://localhost:8160/atg/epub/AgentTransport
Include file systems: /atg/epub/file/ConfigFileSystem
Note: To determine the correct RMI port, you can refer to that ATG server’s /atg/dynamo/Configuration.properties file.
Click Save changes when you are done.
Click the back to deployment administration configuration link.
See also how to initialise your new target environment.


Comments
Post a Comment